Weekly Extra: Tutorial
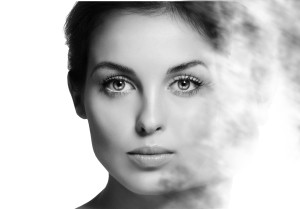
Tutorial on dispersion
1. Open a portrait in Photoshop (works best if the background is plain).
2. Use the magic wand tool to select the person, copy and paste the selection onto a new layer.
3. Duplicate this layer so there are two copies, then hide the layer with the original picture.
4. Us liquefy to stretch one of the layers so that it extends out to one side. Then add a layer mask and invert it (control I).
5. Select the duplicate layer and add a layer mask. Using a soft brush with an interesting shape, start to remove part of the person (use a low opacity).
6. Then select the liquefied layer and begin to paint back the picture. Use a different shape brush once and a while so you can not see any repetition. Make sure the opacity is around 50%.
7. Combine the layers using control<alt<shift<e and add brightness/contrast to the final picture.
Photoshop CC – Dispersion Effect [ Smoke ] [ CS7 ] – YouTube
